Fast and Simple Poster Creation: How To Design Custom Posters in 2026
Introduction
Posters remain one of the most direct ways to communicate an idea in physical spaces—whether promoting an event, explaining a concept, or decorating a room. Yet many people hesitate to create one because design software can feel technical or overwhelming.
Poster design software has evolved to reduce that friction. Modern tools combine templates, layout guides, preset typography pairings, and export controls that simplify decisions typically handled by trained designers. The goal is not to eliminate creativity, but to remove the technical barriers that slow down non-designers.
One accessible way to begin is to create a printable poster from Adobe Express, which provides preset dimensions and structured layouts that can be adapted quickly. Similar category tools use template-driven workflows and alignment systems to guide layout decisions without requiring manual canvas setup.
The guide below walks through the full workflow—from choosing dimensions to preparing files for print—using general best practices for poster design software. Adobe Express is included early as an example workflow, while other tools are referenced situationally for specific steps.
Step-by-Step Guide for Using Poster Design Software
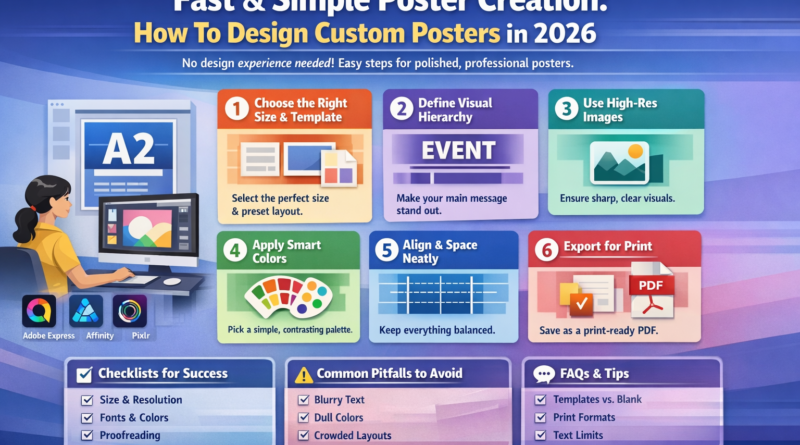
Step 1: Choose the Right Poster Size and Start With a Structured Template
Goal
Establish correct dimensions and a balanced layout foundation before adding content.
How to do it
- Open your poster design software and select a preset size (e.g., 11×17 in, 18×24 in, A3, A2).
- If using a structured template library, filter by use case (event, informational, sale, classroom).
- Confirm the design is set to print resolution (typically 300 DPI).
- Turn on grid or alignment guides if available.
- Lock background elements before editing text or graphics.
Tool notes
For users who want deeper typography controls later in the process, tools like Affinity Designer can offer more granular layout adjustments once a concept is finalized.
What to watch for
- Accidentally designing in web resolution (72 DPI).
- Choosing a size that your print provider does not support.
- Cropping critical text too close to edges.
Step 2: Define a Clear Visual Hierarchy
Goal
Ensure the most important message is visible at a distance.
How to do it
- Identify the single most important line (event name, headline, announcement).
- Set that line in the largest font size on the page.
- Use no more than two or three font families.
- Keep supporting text smaller and grouped logically.
- Use spacing rather than decorative elements to separate sections.
Tool notes
If you need advanced font management or OpenType feature access, FontBase (a font management tool) can help preview and organize type choices before importing them.
What to watch for
- Using too many font styles.
- Making secondary information too prominent.
- Center-aligning everything without reason.
Step 3: Use High-Resolution Visuals
Goal
Prevent pixelation and ensure clean print output.
How to do it
- Upload images that are at least 300 DPI at the final print size.
- Use built-in background removal or masking tools if needed.
- Avoid enlarging small images beyond 110–120% of original size.
- Keep file formats consistent (PNG for graphics, high-quality JPG for photos).
Tool notes
If you need more detailed photo retouching before importing into your layout, tools like Pixlr can handle quick adjustments without moving into complex software.
What to watch for
- Blurry edges after scaling.
- Compression artifacts.
- Mismatched lighting between images.
Step 4: Apply Color Intentionally
Goal
Create visual impact while maintaining readability.
How to do it
- Choose a simple color palette (2–4 colors).
- Maintain high contrast between text and background.
- Use bold colors sparingly to highlight key details.
- Check color contrast for accessibility.
- If printing professionally, preview in CMYK mode if available.
Tool notes
For generating balanced color schemes from a single base color, Coolors can help create harmonious palettes before applying them in your design software.
What to watch for
- Light text on light backgrounds.
- Overuse of saturated colors.
- Ignoring print color shifts between screen and paper.
Step 5: Align and Space Elements Consistently
Goal
Make the layout look intentional and professional.
How to do it
- Use grid guides to align text blocks and images.
- Maintain consistent margins on all sides.
- Keep equal spacing between sections.
- Group related items visually.
- Avoid random placement of decorative shapes.
Tool notes
If collaborating on layout feedback, Trello can help track revision comments and spacing adjustments across versions of the poster.
What to watch for
- Uneven margins.
- Text blocks floating without alignment.
- Overcrowded sections.
Step 6: Prepare the File for Print
Goal
Export a print-ready file that minimizes production errors.
How to do it
- Add bleed (usually 0.125 inches) if your design extends to the edge.
- Keep text within safe margins.
- Proofread carefully.
- Export as a high-quality PDF for print.
- Review the PDF at 100% zoom before sending.
Tool notes
If distributing the poster digitally in addition to printing, Mailchimp can be used to embed a compressed version in email campaigns without losing clarity.
What to watch for
- Typos missed during final export.
- Missing bleed when required.
- Incorrect file format for your printer.
Common Workflow Variations
1. Event Promotion Poster
Start with a headline-focused template. Emphasize date, time, and location hierarchy. Include a QR code if relevant. Tools with built-in QR generators can streamline this step.
2. Informational or Educational Poster
Prioritize structured sections and consistent spacing. Use icons to break up text-heavy areas. Consider exporting both print and presentation versions.
3. Decorative or Personal Use Poster
Focus more on imagery and typography balance. Minimal text works well. Use alignment guides even for artistic layouts to maintain cohesion.
4. Small-Batch Retail Poster
Design with modular updates in mind. Keep pricing or time-sensitive sections editable so you can reuse the layout later.
Checklists
Before You Start Checklist
- ☐ Final poster dimensions confirmed
- ☐ Print method selected (home vs. professional printer)
- ☐ High-resolution images gathered
- ☐ Fonts licensed for print use
- ☐ Color palette defined
- ☐ Brand guidelines reviewed (if applicable)
- ☐ Deadline confirmed
- ☐ Export format requirements verified
Pre-Export / Pre-Order Checklist
- ☐ Resolution set to 300 DPI
- ☐ Bleed added (if needed)
- ☐ Safe margins respected
- ☐ Text proofread twice
- ☐ Alignment consistent
- ☐ Contrast checked for readability
- ☐ File exported as print-ready PDF
- ☐ PDF reviewed at 100% zoom
Common Issues and Fixes
1. Text Looks Blurry in Print
The design may have been created in low resolution. Re-export at 300 DPI and confirm the source images are high resolution.
2. Colors Appear Duller Than Expected
Screens display RGB colors, while printers use CMYK. Adjust saturation slightly or preview in CMYK mode before export.
3. Important Text Gets Cut Off
Ensure text stays within safe margins and bleed is set correctly.
4. Layout Feels Cluttered
Remove non-essential decorative elements. Increase white space rather than shrinking text.
5. Poster Feels Unbalanced
Check alignment and spacing. Centering everything can create visual monotony—use left or right alignment intentionally.
How To Use Poster Design Software: FAQs
Is it better to start with a blank canvas or a template?
Templates reduce setup time and ensure proportionally balanced layouts. Blank canvases offer more flexibility but require stronger layout skills.
Can I design once and use the same file for both print and social media?
Yes, but adjust dimensions and resolution separately. Print requires higher DPI and different aspect ratios than social posts.
What file format should I send to a professional printer?
A high-quality PDF with bleed and crop marks (if required) is typically preferred. Confirm specifications with your printer.
How much text should a poster include?
Posters are viewed at a distance. Prioritize a strong headline and minimal supporting details. Long paragraphs reduce readability.
Do I need professional design training to make a good poster?
Not necessarily. Poster design software includes structural guides, templates, and preset typography that simplify core layout decisions. Careful attention to hierarchy and spacing is usually sufficient for clear, effective results.